Showing posts with label quickandeasy. Show all posts

Monday, 3 February 2014

Traditional Teochew Noodles (Teochew Mee Teow)

Hello world!
Sorry for the lack of updates but I've been busy being lazy. 

This post was scheduled to come out last month but better late than never!
If you're feeling Teochew like me, even though I'm not, here's a simple recipe to get your Teochew tastebuds going crazy. 

Traditional Teochew Noodles (serves 6-8)
Ingredients:
1 packet long life egg noodles
500 grams bean sprouts
100g chives
500g pork belly, skin removed and sliced
100g dried shrimps/prawns
10 cloves garlic
2-3 tbsp vegetable oil
1 tbsp dark soy sauce, add accordingly


Directions:
1. In a hot pan of boiling water, boil the noodles and strain immediately.
2. In a hot wok over low to medium heat, add in oil and garlic and stir-fry until fragrant and slightly golden. Be sure to stir continuously to prevent it from blackening.


3. Add in dried shrimp and stir until fragrant. Then, add in pork belly and stir until the pork is almost cooked through.
4. Add in noodles and stir using chopsticks.


5. Add in dark soy sauce and stir well. Then add in bean sprouts at the base of the wok and cover with noodles to steam the bean sprouts. Add in chives and stir well.
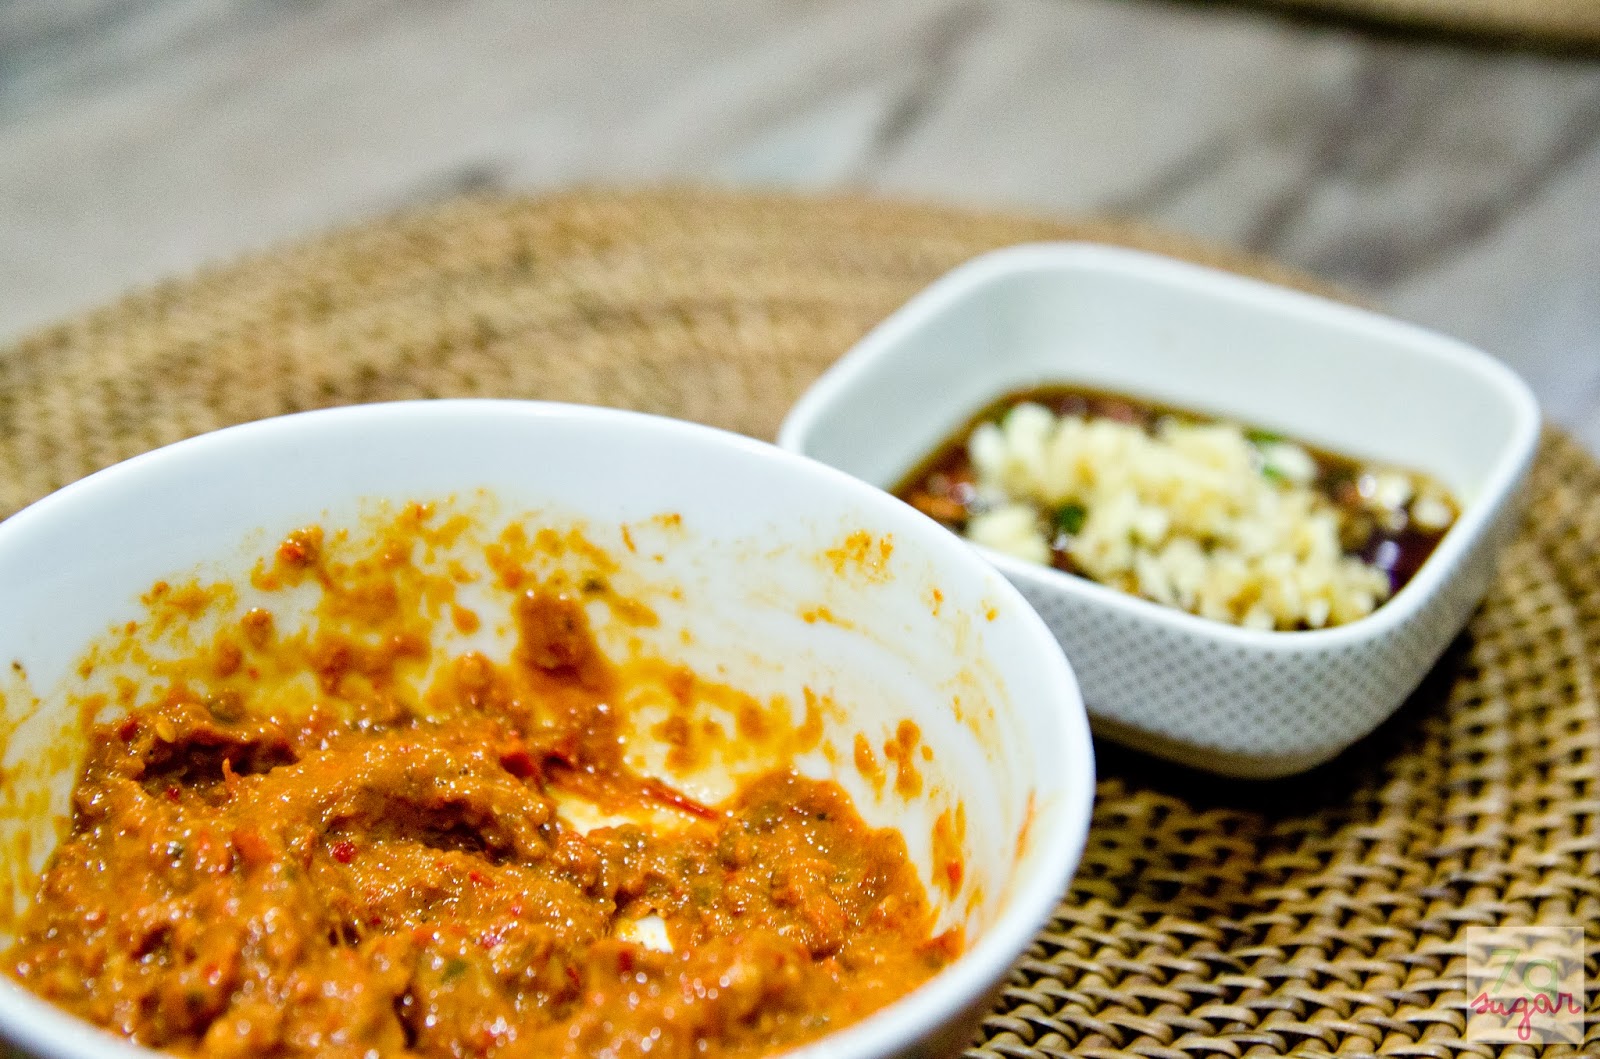
6. Serve with chili paste and/or cut red chilies and garlic in soy sauce.



The finished product.

Friday, 17 January 2014

Tiramisu Recipe


I was really bored the other day and wanted to try my hands on making some desserts, mind you, I actually suck at baking. If you follow my Instagram, you would've seen the disaster that was me trying to make macarons and chiffon cake. So anyway, I started searching for the best tiramisu recipe on the Internet to see if I could pull it off. After my second try, my mom finally gave her seal of approval - the first one was too soggy and the coffee wasn't thick enough.


I got my recipe off taste.com.au as usual and adapted to our liking with my mom's friend's recipe. And don't worry, it won't take you more than an hour to prepare, I promise!

Tiramisu (serves 8)
Ingredients:
For the coffee mixture:
4 heaping tsps of Nescafé coffee powder
4 tsps of caster sugar
1 tsp of vanilla essence
1.5/375ml cups of hot water
A few drops of coffee liqueur/Kahlua/Amaretto (optional)

For the mascarpone mixture: 
3 eggs, separated 
1/3 cup caster sugar
250g mascarpone cheese
300ml thickened cream, lightly whipped
~25 sponge fingers (2 packets, depending on how closely you're laying them later on
Van Houten cocoa powder

Directions:
1. Mix the first four ingredients for the coffee mixture in a shallow dish or a large bowl. 
2. Add in a few drops of coffee liqueur/Kahlua/Amaretto and chill in the fridge while you proceed to making your mascarpone mixture. 

If you want to make a child-friendly version, don't add in the coffee liqueur. Alternatively, I've read that you can swap the alcohol for orange juice but I haven't tried it out myself, so don't take my word for it. 


3. In a large bowl, beat egg yolks and sugar using electric beaters until pale and thick. Then, add in your mascarpone cheese and stir until well combined. Gently fold in the whipped cream until combined. 

I'm not too sure what'll happen if I stirred the whipped cream with too much force but considering that I did have to beat air into it, I didn't want to take any chances. 

4. Whip your egg whites until soft peaks form. I think I went a bit overboard but the mixture still turned out alright. Gently fold your egg whites into the mascarpone mixture. Folding in too vigorously may cause the mixture to deflate. 


I forgot to take a photo of how the egg yolks should look but if you enlarge the first photo in the collage, you'll be able to see the desired colour and consistency - pale and thick.

5. Dip the lady fingers into your coffee mixture but don't dip for too long or it'll become soggy!

Remember, once you chill it overnight, the lady fingers will continue to absorb moisture.

6. Arrange the lady fingers in a dish and then top it with a generous layer of mascarpone cheese. Finally, sift the cocoa powder over the mascarpone mixture and repeat. I made 2 layers but you can opt for more.

This recipe should be able to fill a 19cm square dish. Alternatively, you can put them into a few dishes/containers like I did. Be careful not to layer your tiramisu to the brim, or you won't be able to cover your container later. You must cover the container, otherwise, your tiramisu will dry out.

7. Cover the container with cling wrap or the cover that came with your container. Refrigerate and chill overnight.

This dish is best served two days after preparation, so hang in there!

You can opt to sprinkle the final layer of cocoa powder when you want to eat it but I prefer to let it set together with the rest of the tiramisu just because I don't want to choke on any dried cocoa powder.


Obviously I ran out of the mascarpone mixture until the very end and this was the product. 


Friday, 10 January 2014

Fancy some cheaper sashimi?

So the other day my parents and I were trying to kill time while waiting for relatives and we decided to enter this little shophouse that was open on a Sunday morning. We had no intention whatsoever of buying anything because we purely wanted to kill time. Well, we ended up buying a lot more than we intended to because we wanted to see how fresh the fish really was and whether it was worth our while, because it certainly was worth the money. 

We ended up buying some fresh tuna (~RM15 ea), vacuum packed and frozen salmon (~RM15 ea), unagi (~RM30 ea), short grain rice, miso soup paste, sushi molds, vinegar, wasabe and ginger.

Yep, definitely more than what we expected. 

Because I wanted to photograph the whole experience of eating sashimi at home for the very first time, we whipped out our most 'restauranty' plate and shaved some ice and made the whole plate look pretty.

I think I should stop typing now and let the photos do the talking. 

Yes, boys and girls, this was actually done at home. 


My mom also steamed the frozen unagi. Yes, the restaurants basically just steam your unagi and all of them have already been pre-cooked/pre-grilled, vacuum packed, frozen and sent to your favourite Japanese restaurant, surprise surprise. 

More photos after the jump! Like seriously, just click 'read more'!

Tuesday, 31 December 2013

Easy Crispy-skinned Oven-Baked Chicken Thighs

If you're constantly busy with schoolwork but still want a nice hot meal, here's a quick and easy way to have a satisfying meal without burning down your house! ;)
I was making some pilaf and wanted to incorporate some protein into my dish and I wanted the easy way out so I decided to chuck three chicken thighs into the oven and I was so surprised with the results I HAD to share it.
This recipe is so easy there's no need for a recipe list. All you need is salt, pepper, olive oil, chicken thighs and an oven!
Directions:
1. Preheat your oven at 220C and prepare your chicken.
2. Season your chicken with some salt and pepper on both sides and drizzle with some olive oil.
3. When your oven has reached the desired temperature, place the chicken inside the oven and WALK AWAY after setting your timer to about 20-25 minutes depending on the size of your chicken.
And voila! You have crispy-skinned chicken in no time.
If you want to add more flavour to your dish, you could add in some rosemary or thyme and some garlic as well.
Also, if you're really bored, you could whip up some pilaf to go with it using this recipe here.


Wild rice pilaf served with root vegetables and that oven-baked chicken.

Thursday, 12 December 2013

Linguine Carbonara Without Cream

For some reason, every time I come back on holiday, my dad will ask me to make this dish. Probably because he thinks it's good.
And don't worry, it's easy. Sort of. Let's just say I spent more than an hour trying to cook this the first time I tried it out and it was the first time I cooked an entire meal by myself. Thankfully, it turned out beautiful.
This recipe has been tried and true so I'm pretty sure it'll work, even if you don't have much cooking experience.
The ingredients. Yeah I cheated. I didn't make my own pasta.
Linguine Carbonara Without Cream Recipe (Serves 4) 
You'll need:
~400g pasta of your choice, try to avoid using angel hair and definitely avoid shaped pasta or short cut pasta
~1.5 eggs, depending on how saucy you want it to be and how much noodles you've used
1 cup parmesan cheese, grated. Add more if you like it more cheesy, but remember, it's salty. And yes, I was just making do with whatever I had in the fridge - pizza cheese.
2 purple onions, sliced
3 cloves of garlic, chopped
4 strips of bacon, 1 cm strips
1 1/2 tbsp parsley, chopped
1/2 cup olive oil
Directions:
1. Place the bacon in a pan over low heat, and cook them until all the fat is released.
2. Bring to boil a pot of water, about half-full, and season it with salt. You can add in olive oil at this stage, but I've heard that its not necessary. Once the water is boiling, add in the pasta noodles of your choice. Cook until al dente and strain. Save up about a bowl of the pasta stock for later. Remember: do not run your pasta under cold water. Drizzle some olive oil over the pasta and stir to prevent the noodles from sticking.
3. In a bowl, beat the eggs and half a cup of parmesan cheese until well-combined. Set aside.
4. Remove the cooked bacon from the pan and and some olive oil to the pan and cook the sliced onions on low heat until tender. Add in the chopped garlic about now and continue cooking under low heat until you smell the fragrance of the chopped garlic.
5. Now, add in the pasta noodles and the cooked bacon to the pan with the onions and garlic and combine well.
6. Kill the heat and pour the egg and cheese mixture. Stir to combine.
7. Garnish with the remaining parmesan cheese and some chopped parsley. Serve immediately.

Sunday, 3 November 2013

Two-ingredient Pizza


So I stumbled upon this recipe on Buzzfeed.com and I decided to give it a go. It's super easy and it only takes two ingredients. However, every compromise comes with its fair share of downsides. The pizza crust will definitely not be thin and light like most pizza crusts we have come to know and love. It will end up being a bit chewy but yummy, nonetheless. Because the dough is very heavy, it can easily serve 6-8 people.
Pepperoni Pizza Margherita (serves 6-8)
Crust:
Adapted from kidspot.com.au
1 cup Greek yoghurt or natural yoghurt
1 cup self-raising flour
Dried herbs (eg. oregano, parsley), to taste
Extra flour for dusting the board
Toppings:
1 tube pepperoni, thinly sliced
125g mozarella cheese
2-3 tomatoes
25g basil
Salt, to taste
Pepper, to taste
1. Preheat your oven at 220C.
2. Place greek yoghurt into a bowl and gradually add in self-raising flour while mixing. You don't need a mixer for this and you can just use your hands. Bring together to form a ball. If the dough is still wet, continue to add flour until it becomes stretchy. Be careful not to add too much flour because it will reduce the elasticity of the dough. I think I added like up to 200g more than the required amount for some reason. Some recipes called for a 2:1 flour to yoghurt ratio while this one calls for a 1:1 ratio. So don't be afraid to add more flour if you need to.
2. Sprinkle in some dried herbs to taste
3. Knead the dough on a well-floured board for 5-8 minutes. Roll into a pizza shape and add toppings.
4. Bake your pizza for 20-30 minutes or until the crust becomes golden brown and your cheese is melted.


Tadaa! (: